If you’ve considered having a status page for your service but are discouraged by the pricing of status page services – consider running an open-source status page system like Cachet. This post explains how to install and configure a Cachet status page on the popular DigitalOcean hosting platform. You can run Cachet on DigitalOcean for as little as $5/ month.
Create Your Droplet
If you don’t already have an existing DigitalOcean Droplet to use, create one. We created a 1GB Droplet based on Ubuntu 19.04.
- Create or log in to your DigitalOcean account.
- If you don’t have an account, you can sign up here.
- When you sign up, you’ll get a $50 credit and we’ll get a $25 credit for the referral.
- Create a 1GB Droplet (currently $5/ month)
- Choose Ubuntu 19.04
Login to your Droplet
$ ssh root@[your droplet IP address]Install Dependencies
Cache relies on the PHP programming language. The following packages provide PHP as well as NGINX (webserver), PostgreSQL (database engine), and unzip (needed by the Composer dependency management system to work with zip files).
$ apt-get update

$ apt install -y php7.2 php7.2-cli php7.2-fpm php7.2-common php7.2-xml php7.2-gd php7.2-zip php7.2-mbstring php7.2-pgsql php7.2-opcache php-apc postgresql nginx unzip

$ vim /etc/nginx/sites-available/cachet.conf
Your cachet.conf should look something like this:
server {
   listen 80;
   listen [::]:80;
   server_name status.nimbleindustries.io;

   root /var/www/cachet/public;

   index index.php;

   location / {
      try_files $uri /index.php$is_args$args;
   }

   location ~ .php$ {
      include fastcgi_params;
      fastcgi_pass unix:/var/run/php/php7.2-fpm.sock;
     fastcgi_param SCRIPT_FILENAME $document_root$fastcgi_script_name;
     fastcgi_index index.php;
     fastcgi_keep_conn on;
   }
}
Note: You can use nginx -t to check the syntax of your configuration.
$ cd /etc/nginx/sites-enabled
$ ln -s ../sites-available/cache.conf
$ systemctl restart nginx
Install Cache
mkdir /var/www/cachet
cd /var/www/cachet
git clone https://github.com/cachethq/Cachet.git .
cp .env.example .env
vim .env
We changed DB_DRIVER to pgsql.
Prepare the Database
$ sudo -u postgres createdb cachet
$ sudo -u postgres psql <<< "create user homestead with encrypted password 'secret'"
Complete Installation
Composer is a dependency management system used by many applications written in PHP. The following commands install Composer globally on your DigitalOcean droplet:
$ curl https://getcomposer.org/installer | php
$ mv composer.phar /usr/local/bin/composer
Run composer to install the PHP libraries Cache needs:
$ cd /var/www/cache
$ composer install --no-dev -o
Setup the application key and install cachet:
$ php artisan key:generate
$ php artisan cachet:install
$ sudo chown -R www-data:www-data /var/www/cachet
Finish Setup
If you visit the URL you used during NGINX setup (assuming you have the name configured in DNS or have it in your local /etc/hosts file) you’ll be presented with a few screens to finalize your setup:
Environment Setup
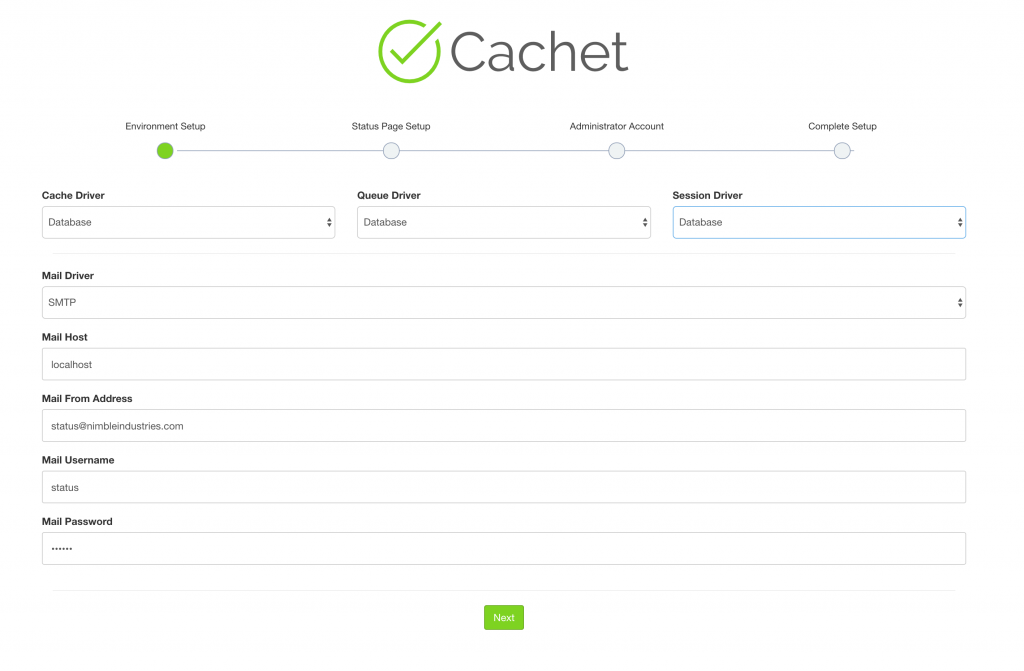
Note: It’s unlikely the SMTP settings are used when using the Log (Testing) mail driver. We set them hoping it’d avoid any error conditions. When you want to move into production, you may wish to switch the driver to SMTP and enter valid mail settings to receive email notifications.
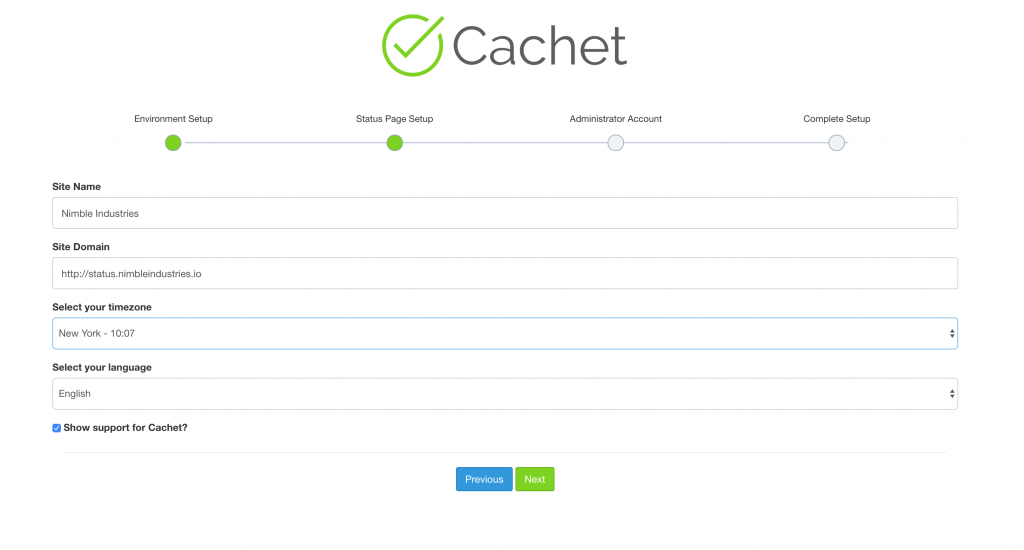
Status Page Setup
Set your site title and other relevant setup information:
Administrator Account
Create your admin user account:
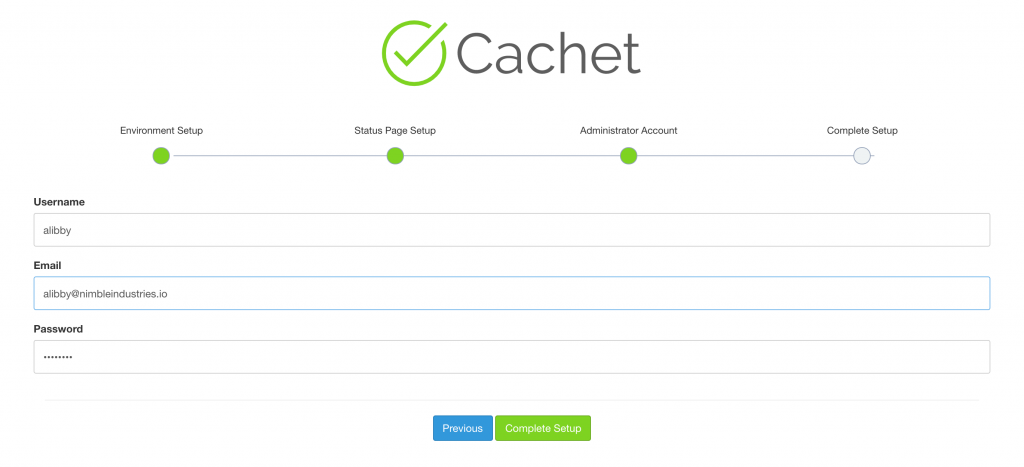
From here you’ll be able to log in and visit the Cachet dashboard to manage incidents or view your status page.
Cachet is a straightforward and easy-to-use status page platform. Due to its open-source nature, it can be run very inexpensively and is a great choice if you need a low-cost status page.
Look for our series on other open-source status page options in the coming weeks.